
How to configure Cloudbeds in Tilopay
The Reservation Management section in the Tools module of the Tilopay Admin Portal is where you can integrate your Hospitality platform with Tilopay.
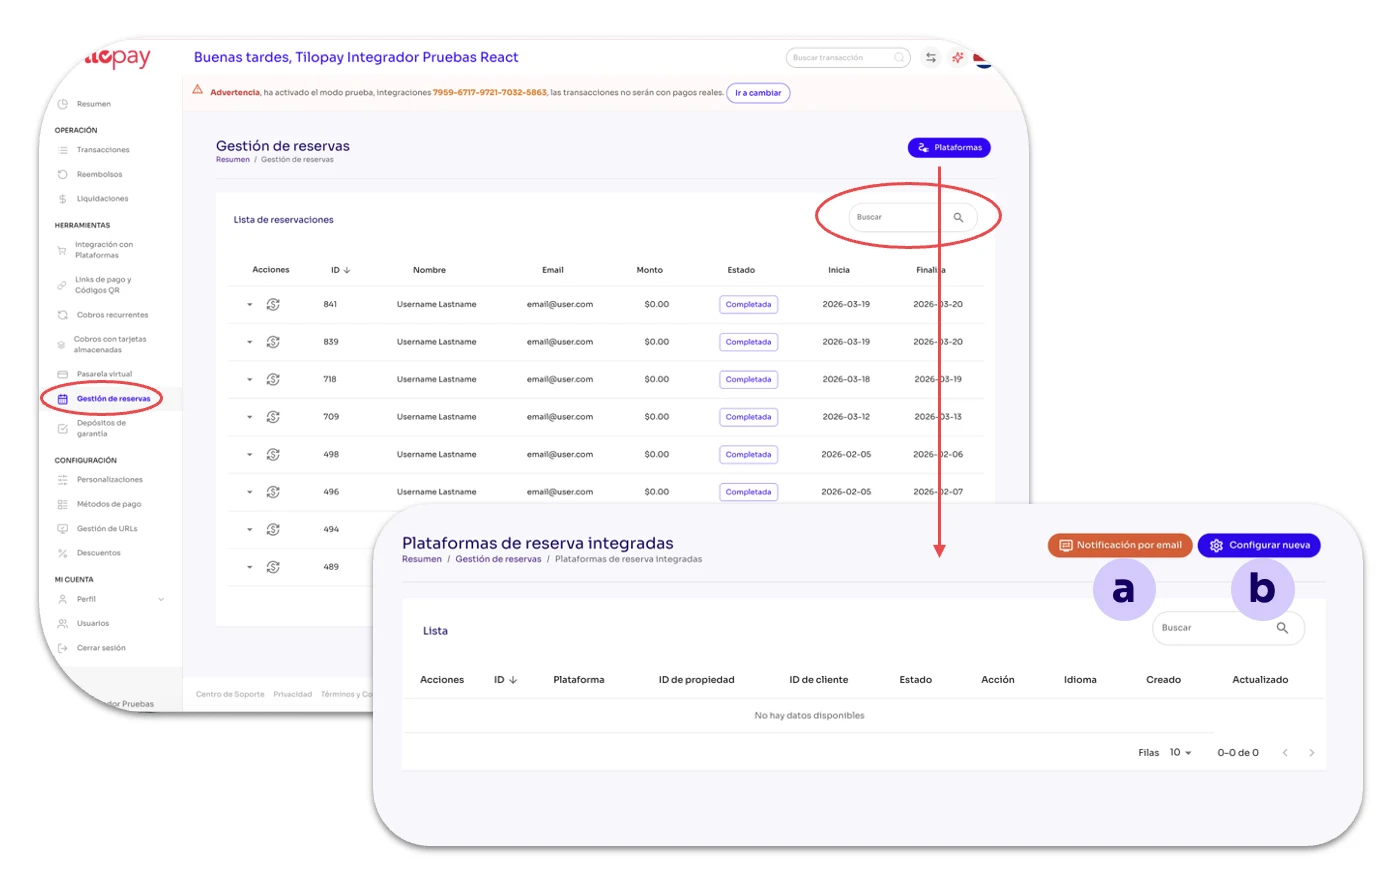
This screen includes a field where you can Search Reservations using any reservation details.
In the Reservation Management section, you’ll find the Platforms button, which gives you access to two other buttons:
a. Email Notification
b. Configure New
From this screen, you can also access the Reservation list for reservations processed through Tilopay.
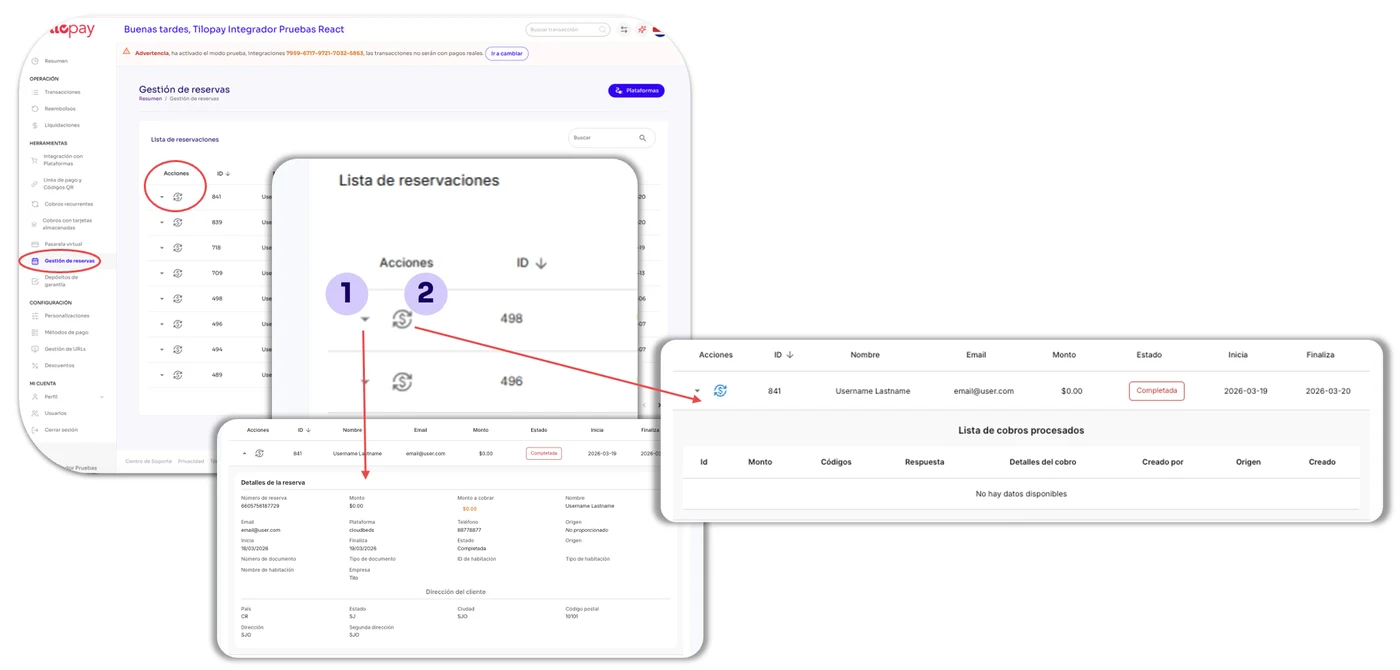
Action Buttons in the Reservation List
Details: This is the arrow icon on the left side of the reservation. Click it to display the reservation details
Payment History: Displays the information for customers enrolled in that plan.
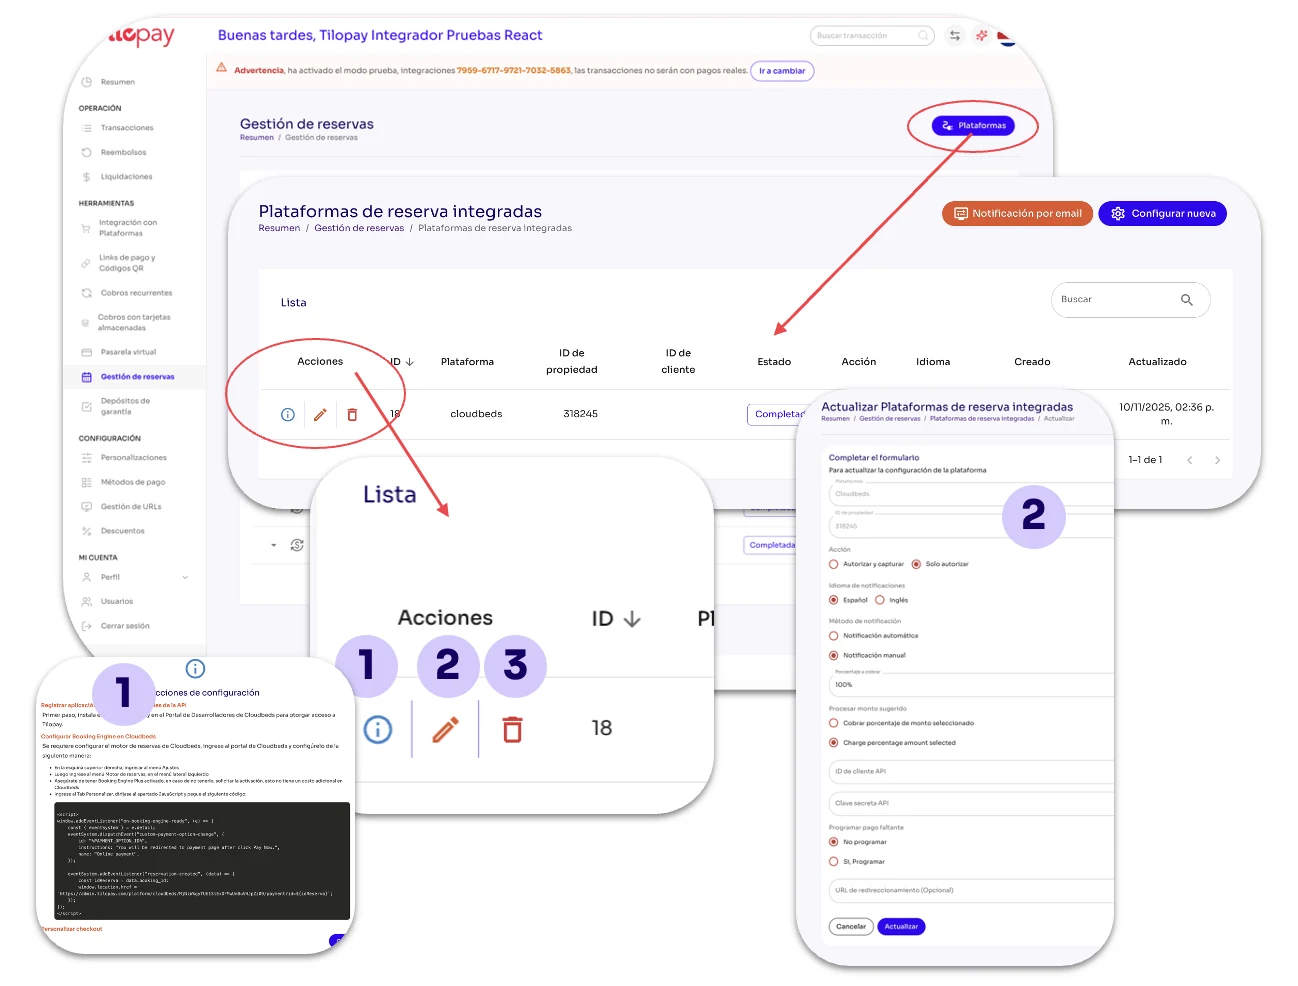
Platform Action Buttons
Click the blue Platforms button to display all the platforms you’ve integrated with Tilopay.
The Action buttons give you access to:
Information: Information and setup instructions for the selected platform.
Update: Opens the integration form so you can edit it.
Trash: Use it when you want to delete subscribers. This action CANNOT be undone.
You’ll also find an Email Notification button and another button to Configure New platforms.
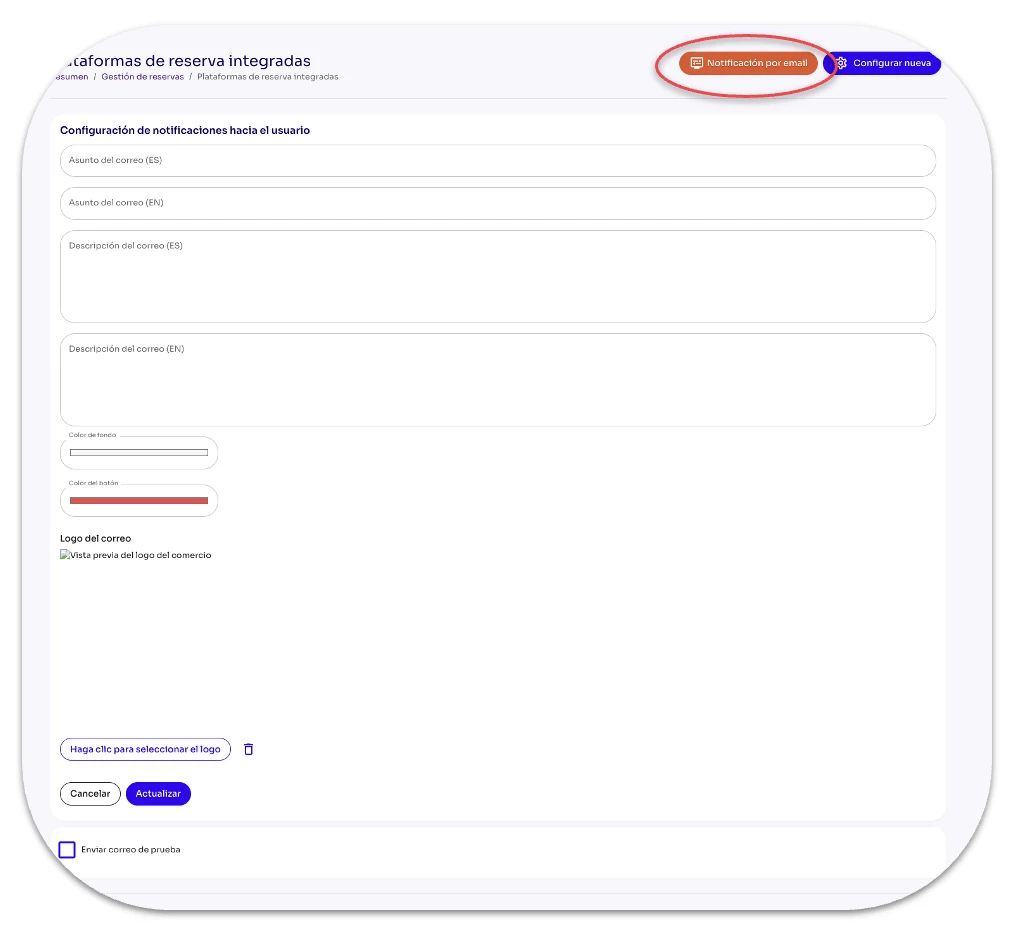
Email Notification is, as its name suggests, the button that lets you configure notifications for your customers.
Email subject (ES): Enter the title you want to give your message in Spanish.
Email subject (EN): Enter the title you want to give your message in English.
Email description (ES): Enter the text you want to send your customers in Spanish.
Email description (EN): Enter the text you want to send your customers in English.
Text color: You’ll see an unlimited color palette where you can select the color you want for the text.
Button color: You’ll see an unlimited color palette where you can select the color you want for the button included in the email.
Email logo: Use the Click to select the logo button to browse for your logo on the device you’re using.
Configure New displays the form you need to complete to set up each Platform integration.
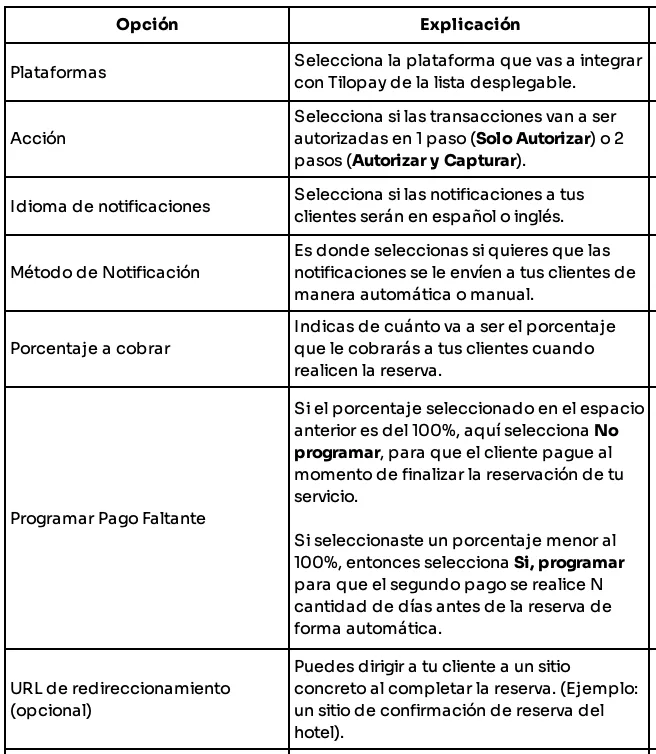
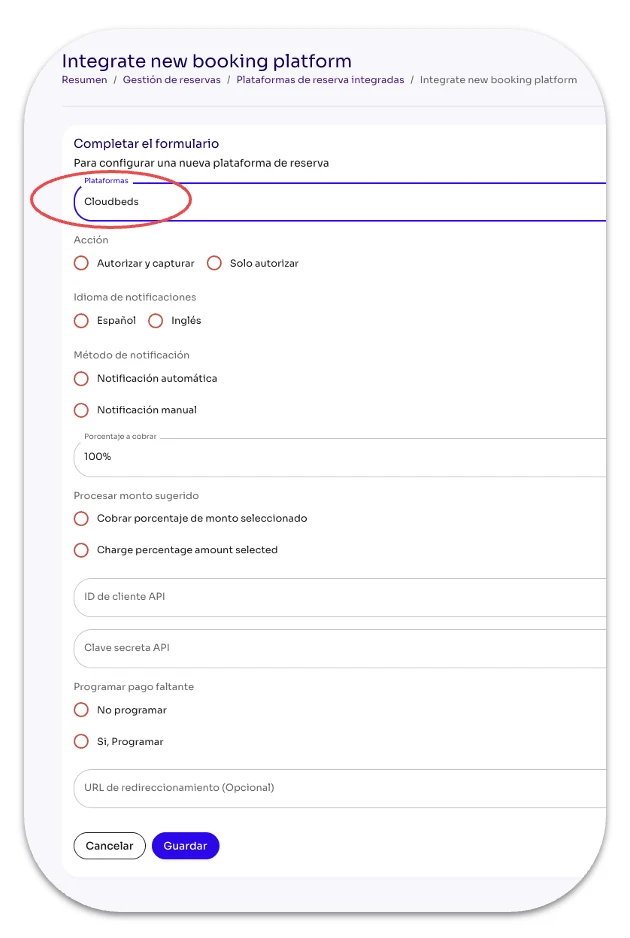
You can find the setup instructions for the Cloudbeds platform by clicking the Action button called Information on the Integrated Reservation Platforms screen.
You’ll need the instructions provided under Information for Cloudbeds later when you configure the Tilopay JSON on the Cloudbeds platform.
Below are step-by-step instructions to help you integrate Cloudbeds with Tilopay without any issues.
Integrate Cloudbeds with Tilopay
To integrate the Cloudbeds platform with Tilopay, follow these steps:
Register the application and get API credentials: Install the Tilopay plugin in the Cloudbeds Developer Portal to grant Tilopay access.
Configure the Booking Engine in Cloudbeds: You need to configure the Cloudbeds booking engine. Log in to the Cloudbeds portal and configure it as follows:
In the upper-right corner, open the Settings menu
Then open the Booking Engine menu from the left sidebar
Make sure Booking Engine Plus is enabled. If it isn’t, request activation. There is no additional cost for this in Cloudbeds
Open the Customize tab, go to the JavaScript section, and paste the following code:
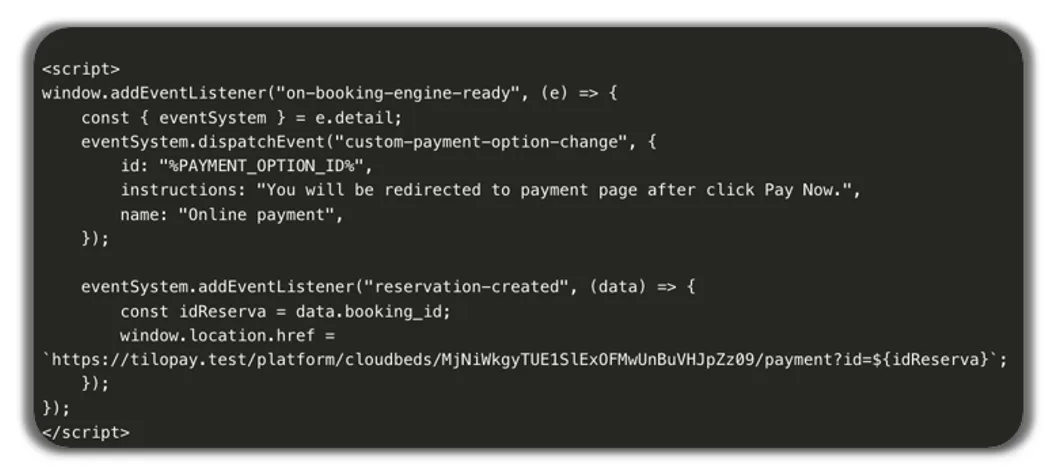
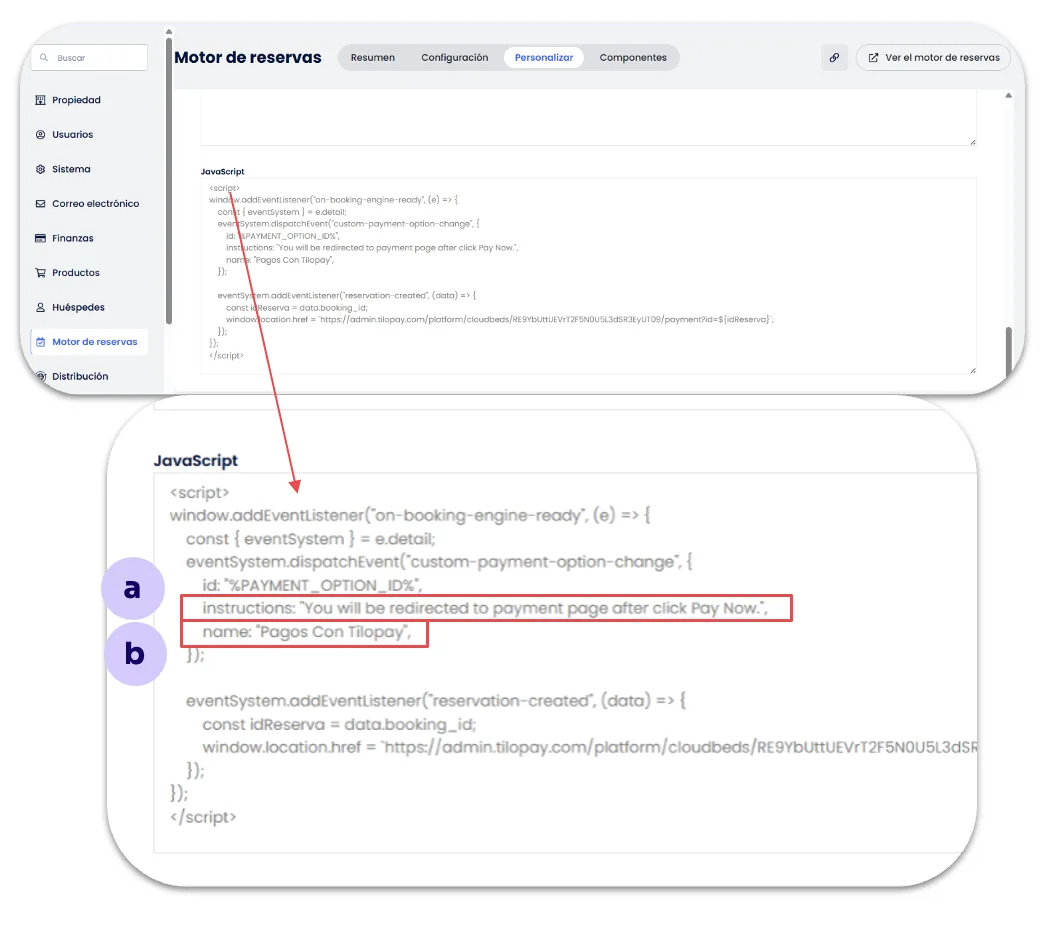
Customize checkout: In the Javascript code above, you can customize the text in the Instructions and Name attributes with the values you want to display at checkout.
Configure payment options in Cloudbeds: In the Payments menu, make sure the credit card toggle is enabled and add the Visa, MasterCard, and Amex card brands. Payments made through this payment method are recorded here.