
Optimized WooCommerce Checkout Process
Equipo Tilopay · 15 de octubre de 2024

Optimize your WooCommerce checkout page with Tilopay, the ideal payment gateway for Panama. Increase conversions and improve the user experience.
Optimized WooCommerce Checkout Process
One of the most critical points in an online store is the checkout process.
A poor experience at this stage can lead to cart abandonment, resulting in lost sales.
Integrating with local payment gateways is key, and having the right solution for WooCommerce is essential.
<< Fast, secure, and hassle-free online payments for your business >>
Why optimizing the checkout process matters
An effective checkout page should be fast, intuitive, and secure.
These features not only improve the user experience, but also build trust, reduce cart abandonment, and increase conversions.
The challenge lies in the lack of local solutions tailored to specific needs. Fortunately, Tilopay, the payment gateway for WooCommerce, improves checkout processes and overcomes these challenges.
Tilopay: the payment gateway for WooCommerce in Panama
One of the main barriers online stores face in this region is integrating local payment gateways.
Tilopay is a solution designed specifically for the needs of merchants in Panama.
Below, you'll learn how to integrate it into your WooCommerce store.
How do you set up Tilopay for WooCommerce?
Setting up Tilopay in WooCommerce is quick and easy, even if you don't have advanced technical experience.
Follow these steps to integrate the Tilopay plugin into your store:
1. First, download and install the Tilopay plugin from the WordPress plugin marketplace.
a. To do this, go to the "Plugins" tab in your WordPress site's admin dashboard.
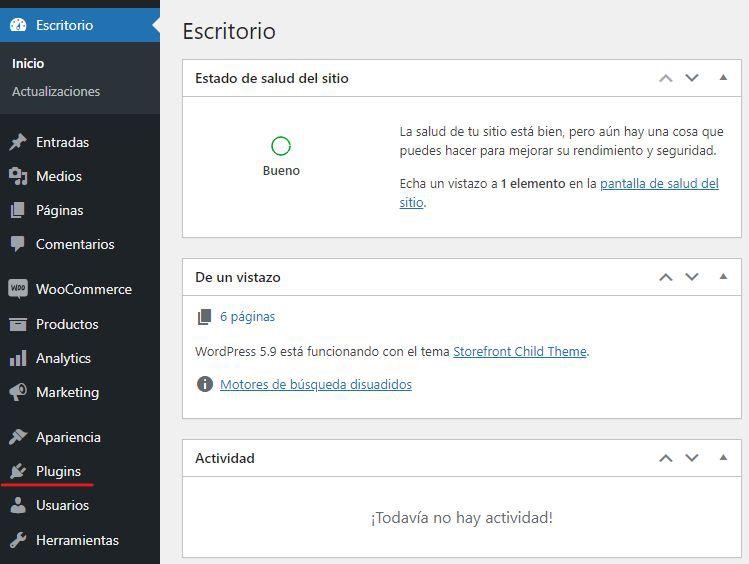
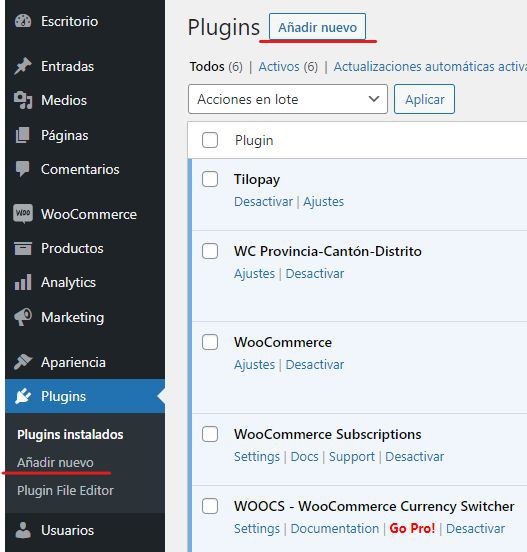
b. Once there, click the "Add New" button or the subtab with the same name.
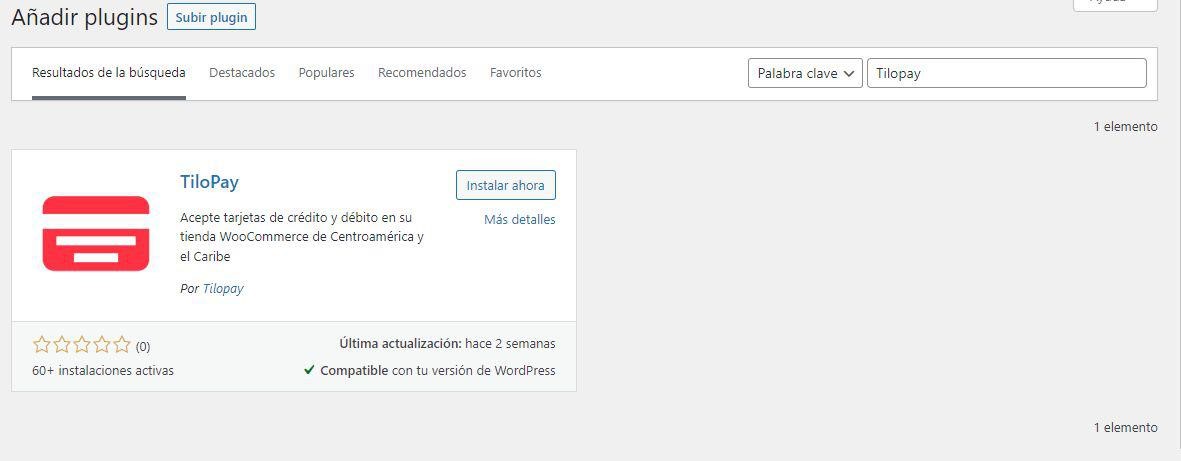
c. Enter "Tilopay" in the search bar. When you find the plugin, click "Install Now."
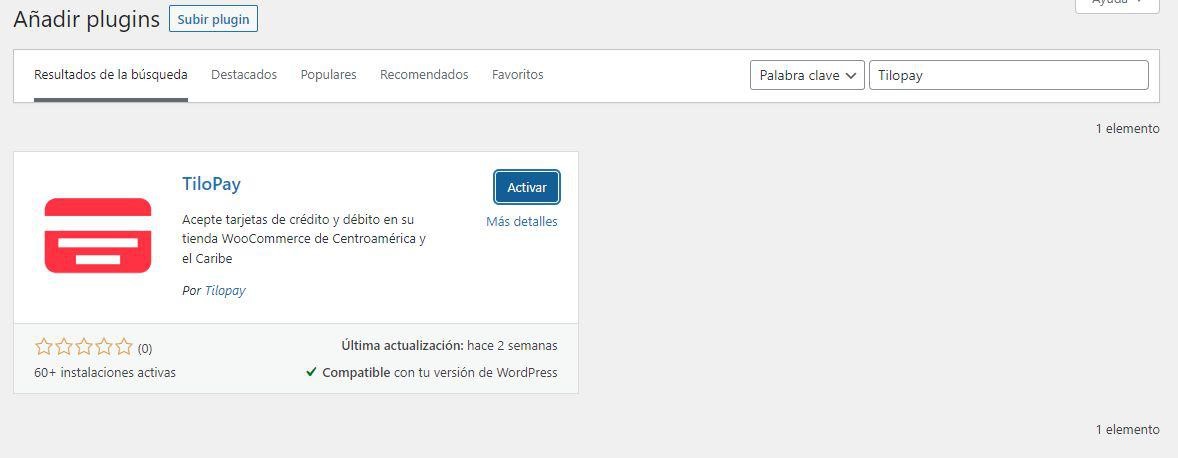
d. Once installed, click "Activate" on the same screen.
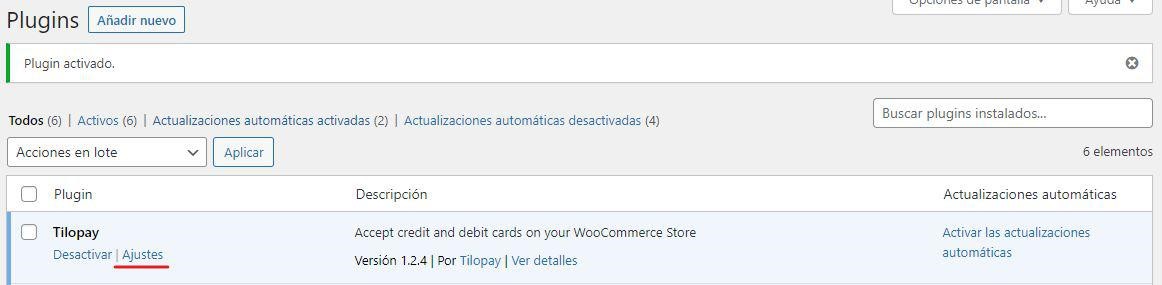
2. After activating the plugin, you'll be redirected to a screen showing all installed plugins. Click "Settings" to configure the plugin. We recommend enabling automatic updates so you always have the latest plugin version, including any newly released updates and improvements.
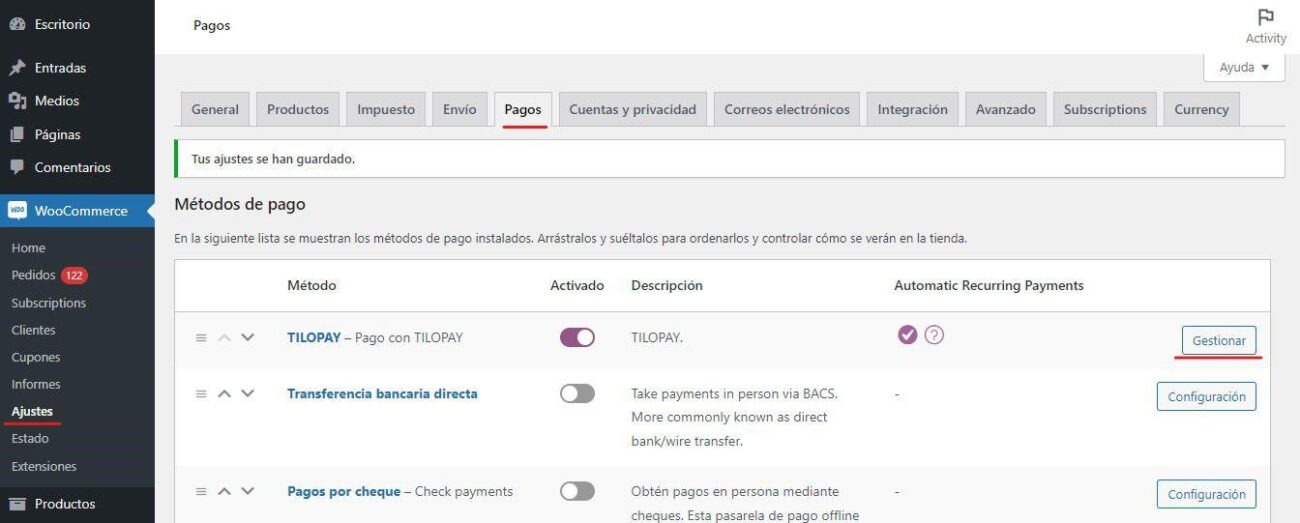
a. You can also access the plugin settings by going to the "Payments" tab under the WooCommerce "Settings" submenu and clicking "Manage."
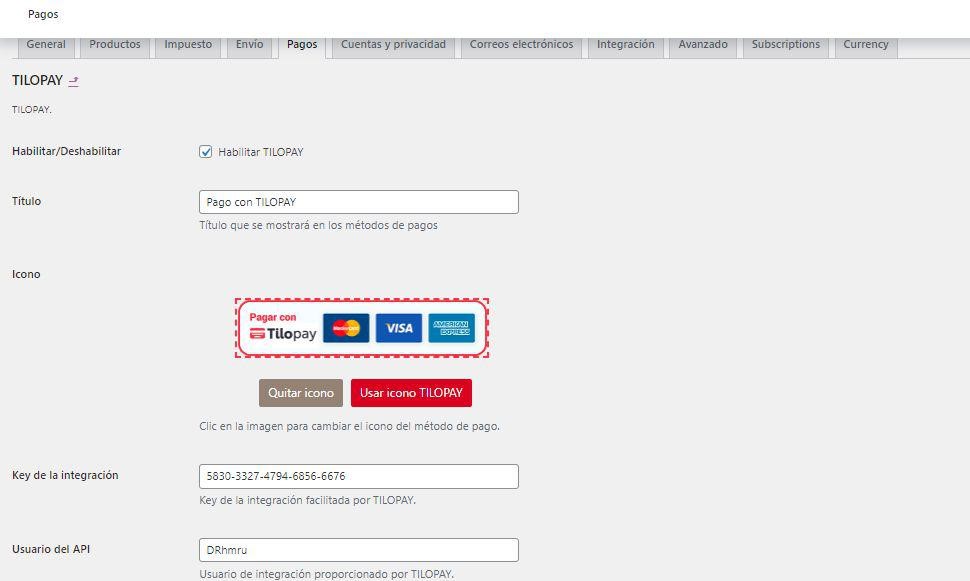
3. The plugin settings include the following options:
a. Enable/Disable: lets you enable or disable the plugin.
b. Title: lets you change the name of the Tilopay payment method on the checkout page.
c. Icon: lets you change the payment method icon. You can use the default Tilopay icon or a custom one.
d. Integration key: enter the key generated through the Tilopay user portal.
e. API user: enter the user for the generated integration.
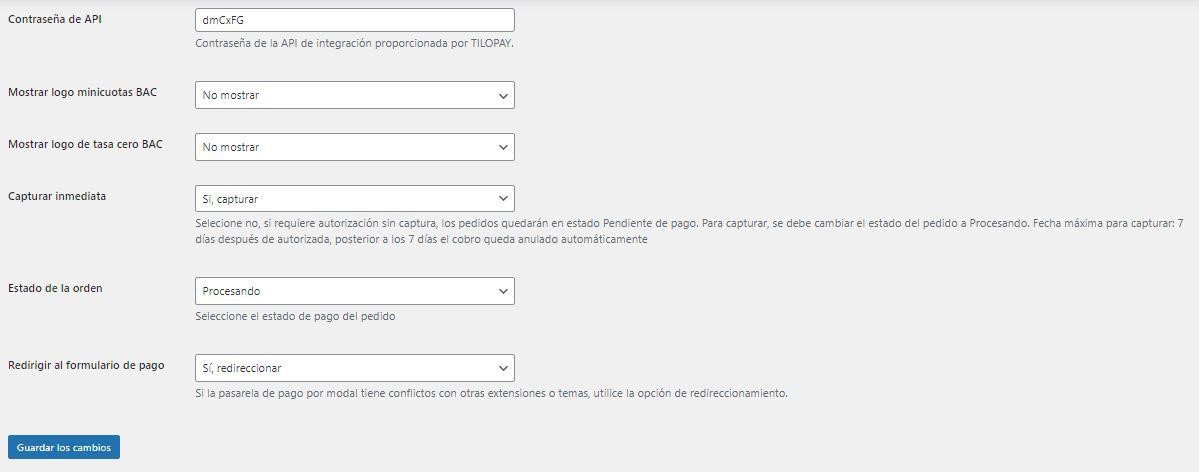
f. API password: enter the password generated for the integration.
g. Show BAC Minicuotas logo: lets you choose whether to display the BAC Credomatic Minicuotas logo.
h. Show BAC Tasa Cero logo: lets you choose whether to display the BAC Credomatic Tasa Cero logo.
i. Immediate capture: lets you capture the payment immediately or partially. You can select:
- "Do not capture" to authorize the payment and manually capture it in a second step. You must capture the payment within 7 calendar days.
- "Yes, capture" to authorize and capture the payment automatically in a single step.
j. Order status: lets you select the status assigned to orders when they enter the platform.
k. Redirect to payment form: lets you choose whether the payment form appears as a modal or on an external page.
4. Once you've configured the settings, click "Save Changes" to apply them.
Optimizing the WooCommerce checkout page is essential for maximizing conversions and delivering a seamless shopping experience. With Tilopay, you can improve your checkout process and provide your customers with a secure, hassle-free experience.
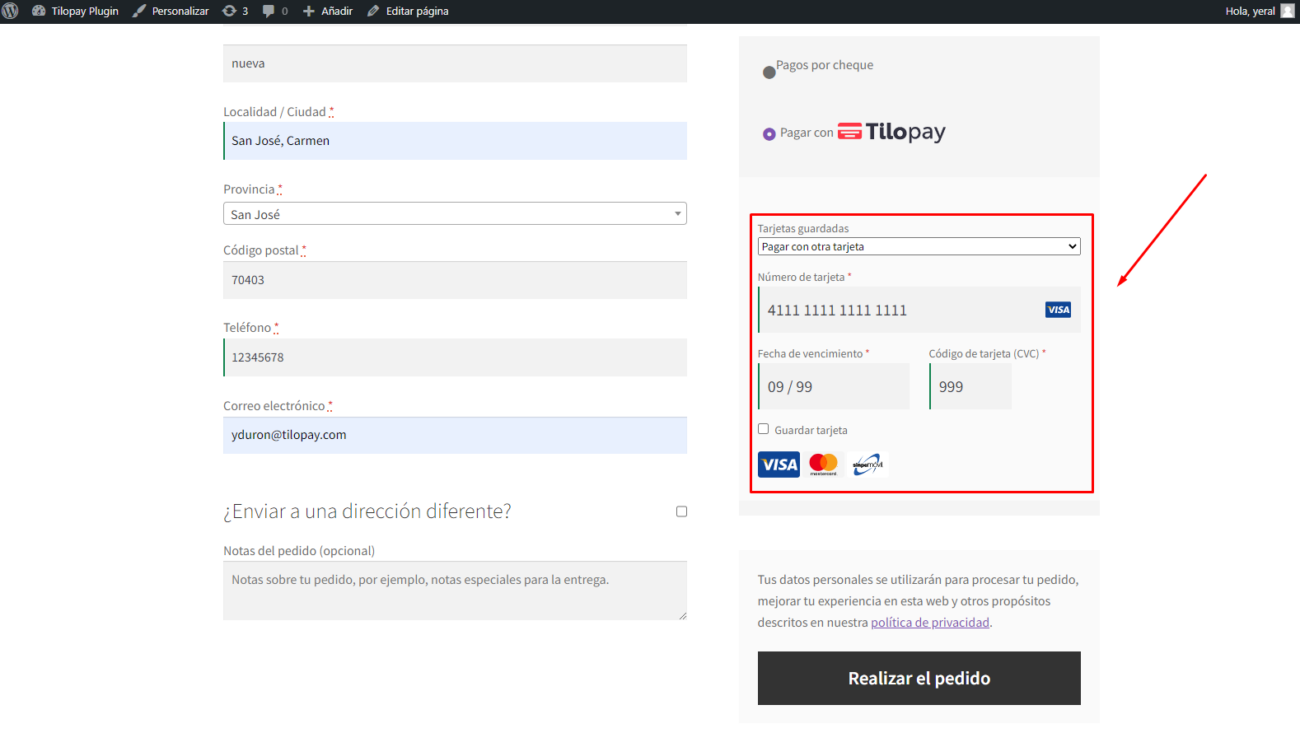
Native payment form
This option integrates natively into the WooCoommerce form so customers can complete their payment.
Once you've configured the settings to fit your needs, click the “Save Changes” button to apply the plugin settings.
You can create your Tilopay account here. It takes less than 5 minutes. With no monthly fees or fixed costs, you can start accepting online payments today and withdraw funds to your local bank account.