
19 Tactics to Improve the Online Checkout Process in Wix
Equipo Tilopay · 16 de octubre de 2024

Improve the online checkout process in Wix with 19 tactics to optimize the user experience and increase your conversion rate.
The online checkout process in Wix is one of the most critical stages for any online store.
An optimized checkout not only improves the user experience but can also significantly increase your conversion rate. An efficient online checkout process is essential for reducing cart abandonment and maximizing sales.
<< Fast, secure, and hassle-free online payments for your business >>
Online checkout process for your Wix ecommerce store
Optimizing your online store’s checkout process is essential for reducing cart abandonment and improving the user experience.
Here are 19 effective ways to optimize this process for your online store built on Wix:
1. Simplify the checkout form: Reduce the number of fields users need to complete. In this case, less is more.
2. Offer multiple payment options: Make sure you include a variety of payment methods, such as credit cards, debit cards, PayPal, and local payment gateways like Tilopay.
3. Enable guest checkout: Let users complete their purchases without creating an account, which speeds up the process.
4. Optimize for mobile: Make sure your checkout process works seamlessly on mobile devices. More and more users are shopping from their phones.
5. Secure the checkout page: Clearly display security seals and use HTTPS to build customer trust.
6. Be transparent about costs: Tell customers about shipping costs, taxes, and other fees before they complete their purchase.
7. Provide a clear cart overview: Let users easily review their cart and make changes before proceeding to payment.
8. Autofill fields: Enable autofill for fields such as addresses and contact information to speed up the process.
9. Provide order confirmation and a summary: Before customers complete their purchase, show them a detailed order summary to review.
10. Optimize load times: Make sure your checkout page loads quickly. Slow load times can frustrate users.
11. Send abandoned cart reminders: Email users who abandoned their carts to remind them about their purchase.
12. Personalize the experience: Use customer data to personalize the checkout experience, such as by offering recommended products.
13. Minimize distractions: Remove unnecessary elements from the checkout page that could distract customers.
14. Add live chat: Offer real-time support during checkout to answer questions and assist users.
15. Make it easy to edit the cart: Let customers modify the products in their cart without leaving the checkout page.
16. Remember user information: If a customer has made a previous purchase, let them save their information for future transactions.
17. Include a “save for later” option: Let users save their cart and return to it later, increasing the likelihood of conversion.
18. Support multiple currencies: If you sell internationally, offer options to pay in different currencies.
19. Optimize the visual design: A clean, professional design can improve customers’ perception of the checkout process and increase their trust.
How do you set up Tilopay for your online checkout process in Wix?
Here are the steps merchants need to follow to set up Tilopay in Wix:
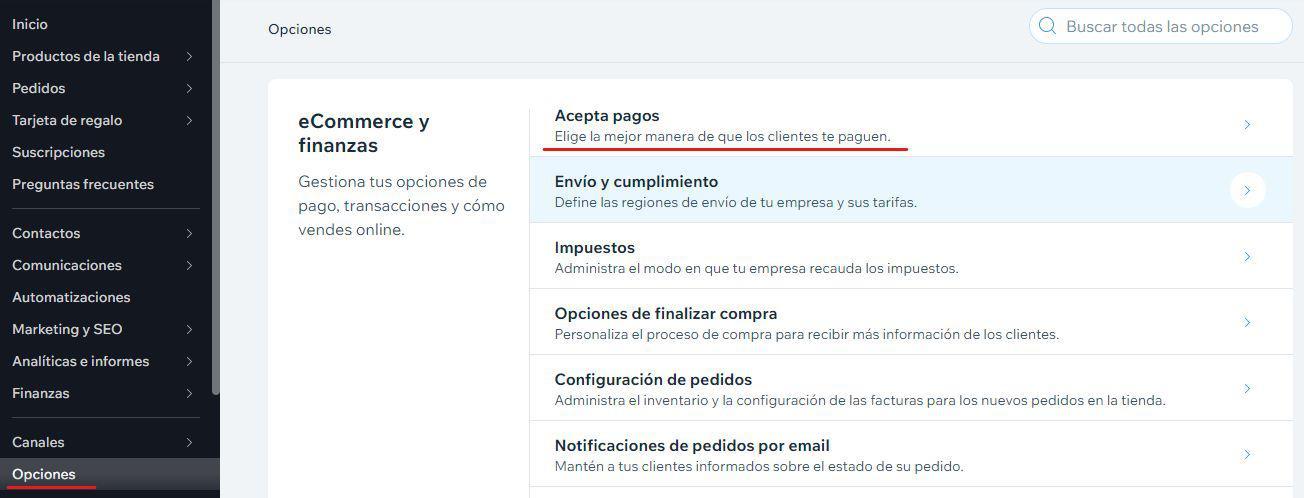
1. The first step is to activate Tilopay as a payment method from the Wix payment options. To do this, go to the “Settings” tab in your Wix site’s admin dashboard. Once there, select “Accept Payments” under the eCommerce & Finance settings group.
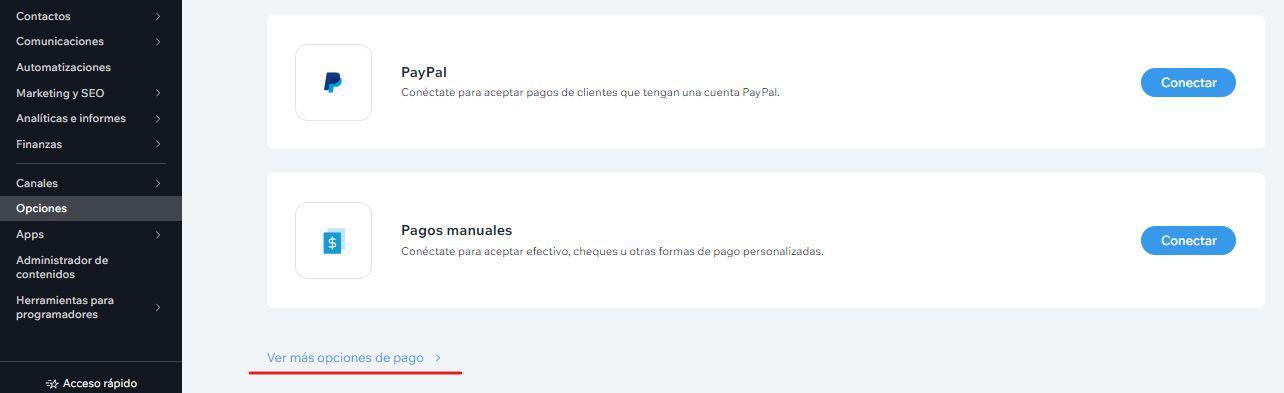
2. After opening these settings, scroll to the bottom of the screen and select “See More Payment Options.”
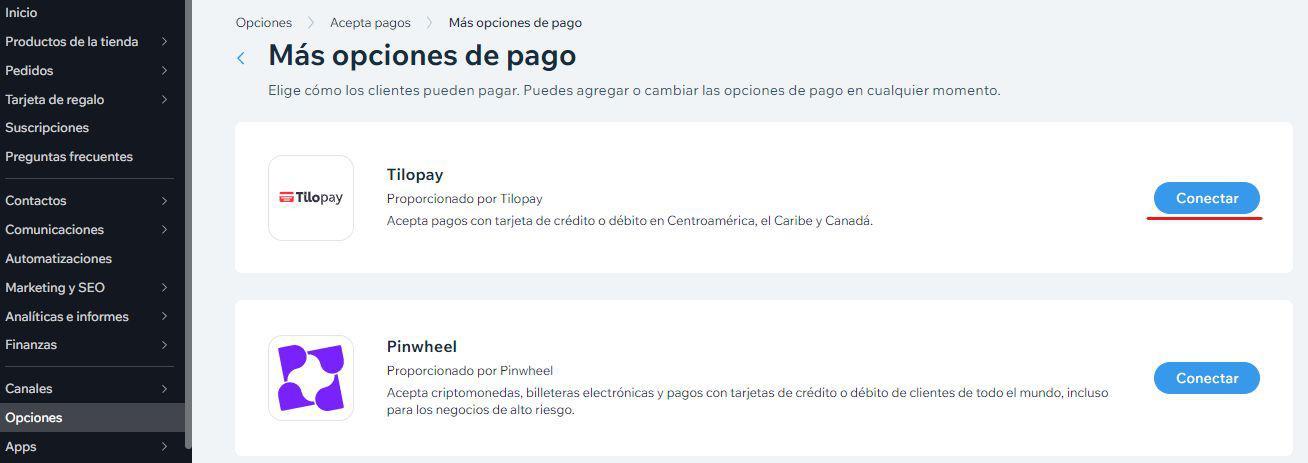
3. Tilopay will appear as the first option. Click “Connect” to connect the integration.
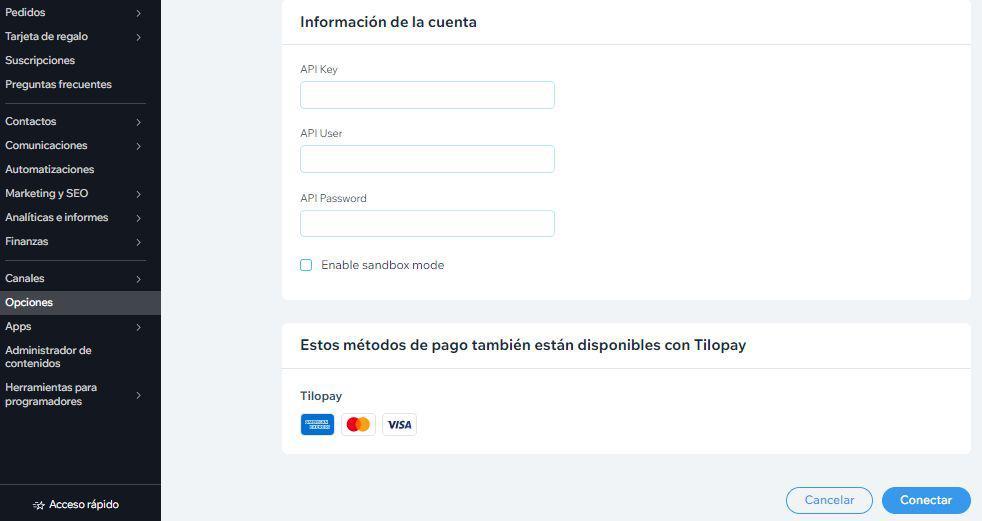
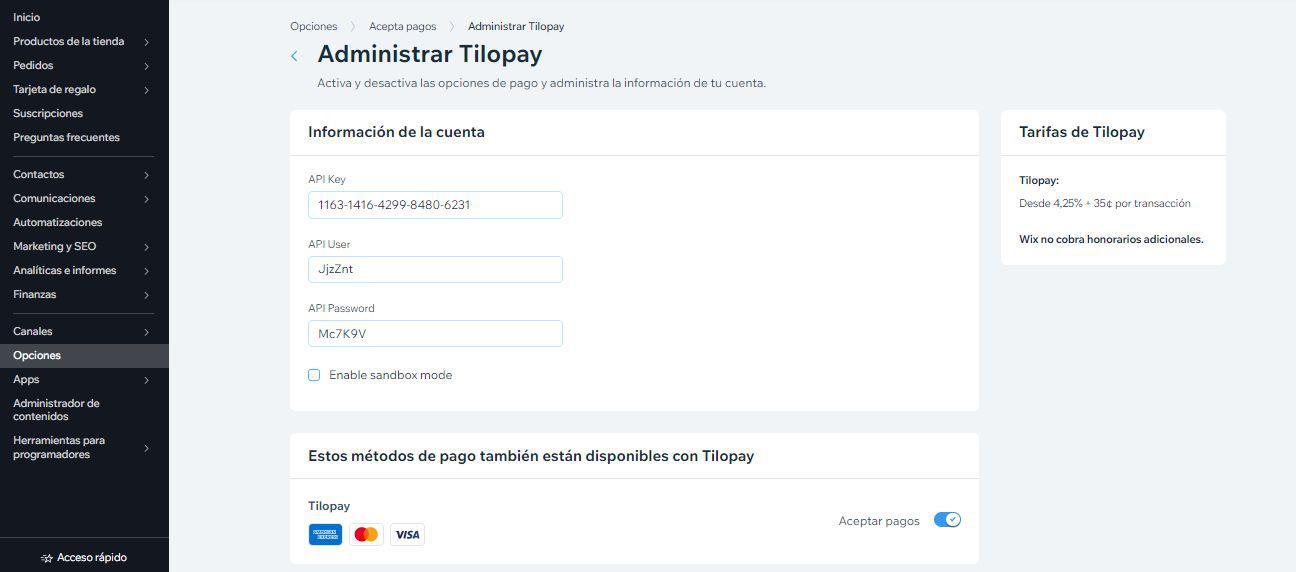
4. Next, you’ll find additional connection instructions, Tilopay’s fees, and the fields where you need to enter the credentials generated through the Tilopay user portal (API Key, API User, and API Password). You’ll also have the option to enable test mode in Wix to run test transactions. When you enable this option, make sure you’re also using test credentials when creating payment methods in Tilopay and that the Tilopay integration environment is set to test mode.
5. Once you’ve entered this information and clicked “Connect,” you’ll receive a message confirming that Tilopay was connected successfully.
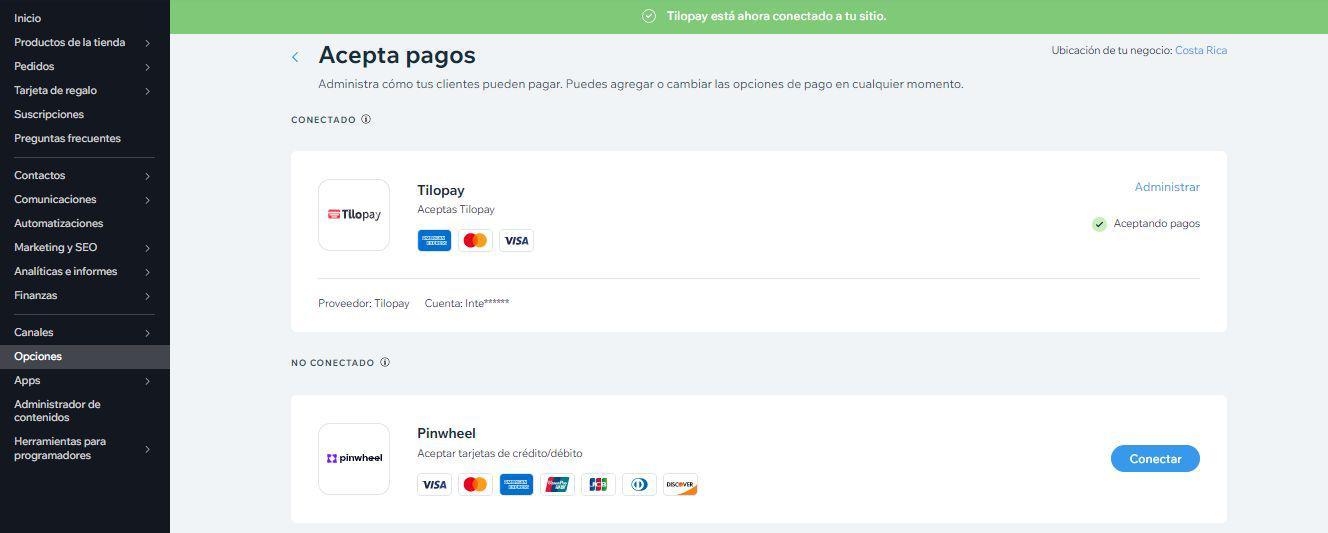
6. After connecting it, you’ll find Tilopay under your configured payment methods. From there, you can adjust your Tilopay settings or disable it entirely by clicking “Manage.”
As ecommerce continues to evolve, you need to adapt and provide customers with an exceptional shopping experience. Integrating Tilopay not only moves you toward a more efficient checkout process but also positions your business to meet future challenges and take advantage of new market opportunities.
Start improving your customers’ experience today and see how it leads to more conversions and sales.
You can create your Tilopay account here. It will take less than 5 minutes. With no monthly fees or fixed costs, you can start accepting online payments today and withdraw funds to your local bank account.